
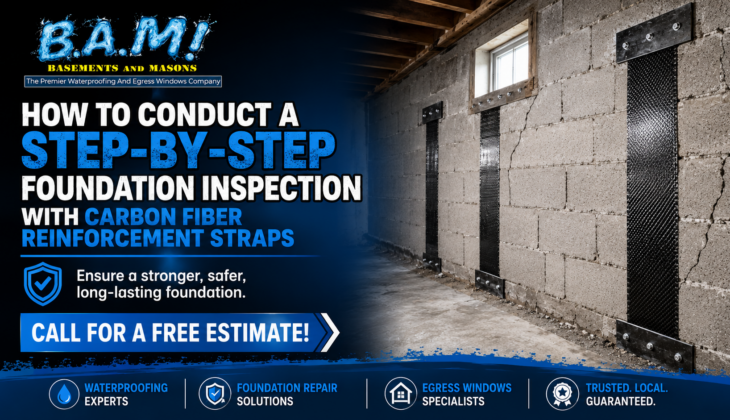
- A foundation inspection isn’t just a visual check — it’s a structured process that tells you exactly what’s failing, why, and what repair method will actually work.
- Carbon fiber straps are a stabilization tool, not a reset button — they stop further movement but won’t push a bowing wall back into its original position.
- Surface preparation is the most critical step in the entire carbon fiber installation process — skip it or rush it and the repair will fail regardless of strap quality.
- Wall displacement measurement matters — a laser level or plumb line can reveal how far a wall has shifted, and that number determines whether straps are even a viable option.
- Bam Basements walks homeowners through these exact steps, helping you understand what’s happening to your foundation before any repair decision is made.
Your Foundation Wall Is Telling You Something — Here’s How to Read It
Foundation walls don’t fail without warning — they send signals for months or even years before the damage becomes severe. The problem is that most homeowners don’t know what to look for or how to interpret what they’re seeing. A horizontal crack running across a block wall means something completely different from a stair-step crack in a brick foundation, and treating them the same way is a costly mistake.
This guide will take you through a comprehensive, step-by-step foundation inspection, specifically looking for damage that may need carbon fiber reinforcement straps. Bam Basements has created this process to help homeowners move from feeling lost to feeling informed — understanding what the problem is, how serious it is, and what steps need to be taken next.
Step 1: Check the Condition of the Walls
First things first, you must physically check every wall in your basement or crawlspace. Don’t just stand in the doorway and give it a quick glance. Walk around the perimeter, get up close and personal with the walls, and don’t forget to bring a flashlight. You’re looking for specific signs of structural issues, not just how it looks on the surface.
Identifying Bowed, Cracked, and Inwardly Displaced Walls
Key indicators of a failing foundation wall include bowed walls, horizontal cracks, and inward movement. A bowed wall is one that has visibly curved or bulged inward, usually due to external soil and hydrostatic pressure. To check for this, run your hand or a straight edge along the wall. Even a slight curve is a red flag and should not be ignored.
Horizontal cracks, especially in concrete block walls, are a major warning sign. They usually appear at the wall’s mid-point, where the lateral soil pressure is at its peak. Stair-step cracks that diagonally traverse mortar joints in block or brick walls suggest differential settlement, which means the wall is sinking unevenly. Vertical cracks, though sometimes less pressing, still need to be assessed as they could be a sign of shrinkage or shifting.
Measuring Tools for Wall Displacement
Just looking at a bowing wall isn’t enough to properly evaluate it. You can use a laser level or a simple plumb bob and string line to get an accurate measurement of how much the wall has moved inward from its original vertical position. This measurement is important because carbon fiber straps are usually suitable for walls that have moved 2 inches or less from plumb. If the wall has moved more than that, you’ll typically need to do more intensive structural work before you can use straps.
What Does Moisture Intrusion and Previous Patching Mean for Your Repair?
Active water intrusion is not just a matter of comfort, it also affects the compatibility of the repair. If water is actively seeping through cracks or joints, it is an indication that hydrostatic pressure is constantly working against the wall. The same moisture can compromise the adhesion of the epoxy during the installation of the carbon fiber strap, which means that a water problem must be addressed either before or during any reinforcement work.
It’s important to pay close attention to any previous patching. If a cracked area has already been treated with hydraulic cement, caulk, or surface coatings, you might need to completely remove this material before you can install the straps. Epoxy can only bond with bare, clean, structurally sound concrete or masonry. It can’t bond with previous repairs that might be loose, contaminated, or incompatible with the adhesive system you’re using.
Step 2: Determine If Carbon Fiber Straps Are the Appropriate Solution
Carbon fiber straps are not a one-size-fits-all solution for every damaged foundation wall. In this step, you must assess whether the condition and type of damage to the wall are suitable for this type of repair.
The Pros and Cons of Carbon Fiber Straps
Carbon fiber straps are great at doing one thing: keeping a wall in place that is bowing, cracking, or moving inward because of the pressure of the soil on the outside. When they are correctly put in place with structural epoxy, they stop the wall from moving further inward by attaching the wall to a fixed point — usually the floor system above and the footing below. They are a tried and tested long-term solution for keeping walls in place when they are used under the right conditions.
What carbon fiber straps cannot do is push a wall back. If a wall has already displaced significantly inward, carbon fiber straps will hold it in its current position — not restore it. They also aren’t appropriate for walls that are structurally compromised at the masonry level, meaning walls with crumbling block cores, widespread spalling, or severe delamination that would prevent a reliable epoxy bond from forming.
When to Consider Other Repair Methods
If you notice a wall displacement of more than 2 inches, any signs of active structural failure, or masonry that’s too damaged to hold an epoxy bond during your inspection, carbon fiber straps aren’t your first option. Instead, you might have to use wall anchors, helical tiebacks, or even replace the entire wall. After you’ve stabilized the wall, you can then use carbon fiber straps for additional reinforcement.
Step 3: Outline the Repair Zone
After you’ve determined that carbon fiber straps are the right choice, it’s time to figure out where they’ll be placed before you start preparing the surface or installing anything. Begin by using chalk or a marker to outline the entire vertical length of the crack or bowing area. Make sure your marks extend above and below the visible damage — straps should cover the whole area that’s been affected and provide enough coverage beyond it, not just the part that’s most clearly visible.
If a wall has one crack or a concentrated area of bowing, start by marking the center of where the strap will go, then work your way out. If you’re dealing with a longer wall that needs multiple straps, space them out according to the manufacturer’s installation instructions. These will take into account the height of the wall, what it’s made of, and how severe the bowing is. Planning your layout properly at this point will prevent you from ending up with misaligned straps or gaps in coverage when you start installing.
Step 4: Get the Wall Surface Ready
The key to a successful carbon fiber strap installation lies in the preparation of the surface. Even if you’re using the best strap system on the market, if the wall surface isn’t adequately cleaned and profiled, the epoxy bond won’t perform as expected, leading to a failed repair. This step is more time-consuming and requires more attention than most homeowners realize.
Our aim is to reveal pure, structurally intact concrete or masonry across the entire area where the strap will be bonded. This means we have to get rid of everything that stands between the epoxy and the base material – paint, sealers, efflorescence, loose aggregate, dust, and any prior patching compounds. The surface has to be not just clean, but mechanically receptive to adhesive bonding.
Start by opening up the surface profile using a wire brush, angle grinder with a grinding disc, or a shot blaster for larger areas. Once you’ve finished grinding, make sure to vacuum or blow out all dust and debris. If there’s any residual moisture left, let the wall dry completely or use a moisture-tolerant epoxy system rated for damp surfaces. However, make sure to confirm compatibility with the strap manufacturer’s specifications before you proceed.
Things to do before applying Epoxy
✓ Remove all paint, sealers, and waterproofing coatings from the area that you want to bond
✓ Grind or wire-brush the surface to expose raw concrete or masonry
✓ Remove all dust, loose aggregate, and debris with a vacuum
✓ Check for active moisture — resolve water intrusion before bonding
✓ Inspect for hollow or delaminating sections by tapping the wall
✓ Remove any prior patching material that isn’t fully bonded to the substrate
✓ Confirm surface is dry or use a moisture-tolerant epoxy if damp conditions exist
Why preparing the surface is the most important step
Epoxy adhesives bond through surface contact and mechanical interlocking with the substrate. A contaminated or smooth surface dramatically reduces the contact area available for bonding, which means the strap isn’t transferring load the way it should. Industry installation guides consistently flag inadequate surface preparation as the leading cause of carbon fiber strap repair failures — not the strap material itself, and not the epoxy formulation.
What to Get Rid of Before Epoxy Application
The list of items to get rid of is specific: paint and latex coatings must be entirely removed because they form a weak boundary layer between the epoxy and the wall. Efflorescence — the white mineral deposits left by water moving through concrete — must be entirely scraped and ground away. Caulk, hydraulic cement patches, and foam fillers applied to previous cracks need to be cut out and removed unless they are fully cured, load-bearing, and confirmed compatible with the epoxy system. When in doubt, get rid of it.
Step 5: Check the Strap Placement and Fit
Once you’ve prepped the wall surface, you’ll want to double-check the strap placement and get the material ready before you mix any epoxy. This is the dry-run stage — you won’t be applying any adhesive to the wall yet. Making sure the placement is correct before you commit to using the epoxy will prevent misalignment, coverage gaps, and wasting materials.
Look back at the layout marks you made during Step 3. Make sure that the marked areas are still correct after grinding and preparing the surface. Grinding can sometimes erase chalk lines or move visual reference points. If the marks moved, use a tape measure and level to put them back before you continue.
How to Accurately Measure and Cut Carbon Fiber Straps
Start by measuring the total vertical distance from the top anchor point to the bottom anchor point. Then, add the overlap length specified by the manufacturer at each end. This is usually 6 to 12 inches beyond the edge of the crack terminus or bowing zone, depending on the system. To cut the strap, use heavy-duty shears or a utility knife with a new blade. Carbon fiber will cut cleanly if the blade is sharp. If the blade is dull, it can fray the fiber weave. This will weaken the edges of the strap and could compromise the bond perimeter.
Make sure not to stretch, fold, or crease the strap while handling it. Carbon fiber is sturdy in its fiber direction but can be damaged by sharp bends or kinking. Keep the strap flat and supported while cutting it and moving it to the wall to ensure its structural integrity remains intact during installation.
Test Fitting the Strap Before Applying the Epoxy
Place the cut strap on the wall where it will be installed. Make sure it fully covers the marked repair area, is aligned with the wall’s vertical axis, and extends enough at the top and bottom anchor points. If the wall is uneven or the strap needs to cover a deep crack, make note of those areas. You’ll need to apply a leveling layer of epoxy filler before the final installation coat. A test fit only takes two minutes and can prevent issues with coverage after the epoxy has been applied to the wall.
Step 6: Strap Installation with Epoxy
This is the stage where the work is done, and the time you have to work with the structural epoxy is finite. Most two-part epoxy systems that are used for carbon fiber strap applications have a working time — or pot life — of 20 to 40 minutes, depending on the temperature of the environment. If it’s warmer, the curing time will speed up and the window will be shorter, but if it’s cooler, the window will be longer. Make sure you know the specifications of your product before you mix it.
Adhere to the manufacturer’s instructions when mixing the epoxy. The majority of structural epoxy systems require a 1:1 or 2:1 volume ratio. If you don’t mix enough or mix the wrong ratio, you’ll end up with an epoxy that doesn’t cure properly. This will result in a weak bond layer that can’t handle the load the strap is supposed to transfer. To avoid creating air bubbles, blend thoroughly using a paddle mixer on a drill set to a low speed.
Quick Overview of Epoxy Application
Step 1: Mix the epoxy according to the manufacturer’s instructions — don’t guess
Step 2: Apply the first coat to the wall with a notched trowel or brush
Step 3: Firmly press the carbon fiber strap into the wet epoxy, making sure it’s centered on the layout marks
Step 4: Apply a second coat of epoxy over the strap, making sure to saturate all of the fiber weave
Step 5: Use a ribbed roller to roll the strap, removing any air pockets and ensuring full contact
Step 6: Check the edges for dry spots and apply more epoxy where necessary
By applying epoxy to the wall, pressing the strap into it, and then applying epoxy over the strap, the carbon fiber is fully saturated and bonded on both sides. This full encapsulation is what gives the system its structural strength. A strap that is only bonded on one side is much weaker than one that is fully embedded in the epoxy.
When applying the straps, be extra careful with the edges. This is where disbonding usually starts. Use a brush to apply epoxy into the fiber weave along all four edges of the strap. After you place the strap, use a ribbed laminate roller and run it down the length of the strap. This will remove any trapped air and make sure the entire bonded area is in contact.
How to Use Epoxy for Complete Bond Contact
Put on the initial epoxy coat in an even thickness throughout the entire strap footprint — thin areas create weak spots. Use a notched trowel for larger straps to ensure consistent coverage, then change to a brush for edge work and detailed areas around anchor points. When you push the strap into the wet epoxy, apply steady, even hand pressure from the middle outward to push any trapped air toward the edges rather than trapping it under the strap.
When you apply the second layer on top of the strap surface, it should completely saturate the carbon fiber weave. You can tell when saturation is complete because the individual fibers will no longer be visible as separate strands and the surface will have a uniform, slightly glossy look. If any areas still appear dry or fibrous after the second coat, they need another round of epoxy before the working time runs out.
When to Use Anchors or Top Restraint Details
There are carbon fiber strap systems that come with mechanical anchor plates or top-of-wall connection hardware. These elements connect the strap to the floor system or rim joist above it. They are usually used when the wall needs extra resistance at the top anchor point. This is especially true when the floor system doesn’t directly touch the wall, or when the bowing wall needs resistance against both inward movement and upward displacement. If your system calls for anchor hardware, you should install it according to the detail drawings provided by the manufacturer before the epoxy fully cures.
Step 7: Final Check and Quality Control
After the epoxy is fully cured, which usually takes between 24 and 72 hours depending on the product and temperature conditions, a final check should be carried out before the repair area is painted, finished, or covered. Feel all four edges of the strap with your hand and listen for any hollow sound when tapping the surface lightly with a knuckle. A solid, consistent tap tone indicates full adhesion. A hollow or drum-like sound in any area means that section of the strap has not bonded to the wall and will need to be addressed before the repair is considered complete.
Identifying Correct Adhesion and Alignment
When a carbon fiber strap is installed correctly, it will be completely flush with the wall, with no lifted edges, bubbles, or visible gaps between the strap and the wall. The epoxy should be hard and consistent across the entire width of the strap — you should not be able to bend or peel any part of it away from the wall with your hand. The strap should be vertically aligned without any wavering, centered directly over the area you marked for repair in Step 3.
Pay special attention to the top and bottom anchor zones. These points bear the brunt of the system’s load, and any disbonding at the ends can drastically decrease the strap’s ability to resist wall movement. If you discover a section that did not bond properly, grind the affected area, apply epoxy again, and press the strap back into contact. If there are larger disbonded zones, consult with a structural specialist before covering the repair.
Thoughts on Cure Time and Finishing
The time it takes for a product to cure can differ, but the majority of structural epoxy systems used in carbon fiber strap installations achieve their full mechanical strength within 24 to 72 hours at room temperature. Until it is confirmed that the product has fully cured, do not paint, cover, or apply any finishing material to the strap or the surrounding wall area. If you finish too soon, you could trap moisture, put stress into the bond layer, and make it impossible to inspect the repair in the future without destructive testing.
- Allow a minimum of 24 hours before light foot traffic or any contact with the strap surface
- Wait the full 72-hour cure window before applying waterproofing coatings or paint
- Do not frame directly against the strap without confirming it’s fully cured and bonded
- Keep ambient temperature above 50°F during the cure window — cold temperatures significantly slow epoxy cure and can result in incomplete hardening
- Document the repair with photos before any finishing material is applied — this creates a baseline for future inspections
After the cure window has passed, the repaired wall can be painted with a latex or epoxy-based masonry paint compatible with the epoxy surface. Avoid oil-based coatings unless confirmed compatible with the specific epoxy system used, as adhesion failure between the topcoat and cured epoxy can cause peeling that masks the strap edges and makes future inspections more difficult.
As you continue, make sure to check the repaired wall at least once a year. The best time to do this is in the spring, after the ground has been saturated from snowmelt and rain. You should be looking for any new cracks next to the strap, any new moisture intrusion, or signs of movement at the anchor points. If the carbon fiber strap system has been installed correctly, there should be no changes from year to year. If there are any new movements, this means that more structural intervention is needed.
4 Potential Problems That Can Ruin Your Carbon Fiber Repair
Even if you conduct a thorough inspection and install the straps correctly, there are four specific situations that can ruin a carbon fiber strap repair. Active water intrusion at the repair site makes it impossible for the epoxy to stick properly and suggests that the hydrostatic pressure might be too much for the straps to handle on their own. Wall displacement greater than 2 inches from plumb suggests that the wall has moved too much for the straps to be effective by themselves. Crumbling or delaminating masonry in the bond zone creates a weak layer that will fail before the epoxy does — the strap might seem to be bonded, but the wall material underneath it is coming apart. And previously applied coatings or patches that weren’t fully removed during surface preparation create a layer of contamination that prevents the epoxy from bonding properly with the substrate, no matter how good the strap looks from the outside.
Don’t Ignore Your Crumbling Foundation Wall — Here’s What to Do Next with Bam Basements
Damage to a foundation wall usually follows a certain path: it begins as a minor issue, gets ignored as just a superficial problem, and then suddenly worsens — often when the pressure from the soil is at its highest in the spring or after a heavy rainfall. The inspection process we’ve laid out here will help you understand what’s going on before things get worse.
The team at Bam Basements are experts in stabilizing foundations, guiding homeowners from worry to a solid, actionable repair plan. This might involve carbon fiber straps, wall anchors, or a broader structural solution.
Commonly Asked Questions
These are the questions homeowners usually ask after they’ve finished a foundation inspection and are considering their repair choices.
How Can I Tell If My Foundation Wall Needs Carbon Fiber Straps or a Complete Replacement?
What determines this is the structural integrity of the wall itself and the amount of displacement. Carbon fiber straps are suitable when the wall is still fundamentally solid — meaning the masonry or concrete is intact enough to maintain an epoxy bond — and the inward displacement is 2 inches or less from plumb.
When a wall has suffered from major structural damage: extensive block core collapse, substantial displacement beyond the 2-inch limit with no suitable anchor points, or repeated unsuccessful repairs that suggest the wall is no longer capable of bearing a load, a complete wall replacement is required. A laser level measurement during your inspection will provide you with the displacement figure you need to make this decision with certainty.
Often, the solution isn’t a simple choice between one or the other — it’s a matter of doing things in the right order. A wall that’s seriously out of alignment might need to be mechanically corrected first, using wall anchors or helical tiebacks, and then have carbon fiber straps installed to keep it stable in the long term, once it’s been brought back within acceptable limits. The best way to figure out the right order for your particular wall situation is to get a professional evaluation that includes actual measurements of how far out of alignment the wall is.
Is it possible for me to install carbon fiber foundation straps on my own?
While you can purchase the materials, the installation process is more complex and requires the use of structural epoxy with a limited working time, meticulous surface preparation, and the placement of load-bearing anchors. Any mistakes in these areas, such as mixing the epoxy incorrectly, not preparing the surface properly, or placing the anchors in the wrong place, can result in a repair that appears to be correct but is not structurally sound. Given that the repair is meant to maintain the structural integrity of your home, it is considerably less risky to have it professionally installed with an inspection and warranty.
How Long Do Carbon Fiber Foundation Straps Last?
| Condition Factor | Impact on Strap Longevity |
|---|---|
| Proper surface preparation | Critical — determines bond integrity for the life of the repair |
| Epoxy mix ratio accuracy | Off-ratio mixing reduces cure strength and long-term durability |
| Moisture at installation | Active water intrusion compromises initial bond formation |
| Ongoing water management | Unresolved hydrostatic pressure continues stressing the wall |
| Annual inspection | Catches new movement or adjacent cracking before it escalates |
Carbon fiber as a material does not rust, rot, or degrade under normal basement conditions. When installed correctly on a properly prepared substrate with fully cured structural epoxy, the bond is designed to be permanent. The strap itself will not weaken over time the way steel anchors can corrode or wood blocking can deteriorate. For more detailed guidance, consider following a foundation inspection guide to ensure the longevity of your repairs.
Almost always, the lifespan of a strap is limited by the quality of the installation, specifically the bond of the epoxy. A repair that was installed with contaminated surfaces, epoxy that was not mixed well, or incomplete saturation of the fiber weave may seem to be intact for years before it becomes visible that it is disbonding. This is why it is a good idea to continue to visually inspect the straps every year and to tap the edges of the straps to test them.
When carbon fiber strap repairs are installed correctly and paired with proper water management, they typically last the lifetime of the structure. Many professional installation systems come with transferable warranties of 25 years or more. This is because the material and installation method, when done correctly, are designed to be a permanent structural solution — not a temporary patch.
Will Carbon Fiber Straps Return My Bulging Wall to Its Original Position?
They won’t — this is a key difference you need to know before deciding on a carbon fiber repair. Straps are meant to stabilize, not restore. After they’re installed and cured, they prevent more inward movement by fixing the wall between the floor system and the footing. The wall remains in its position at the time of installation.
If you need to return the wall to its original upright position — either for structural reasons or for finishing purposes — you will need to use active wall correction. This can be done using methods like wall anchors with periodic tightening or hydraulic systems that apply controlled outward pressure over time. Once the correction is complete, you can add carbon fiber straps to provide permanent stabilization in the restored position.
What’s the Right Number of Carbon Fiber Straps for My Foundation Wall?
It’s not a one-size-fits-all answer. The number of straps you need depends on the length and height of your wall, the materials it’s made from, and how severe the deflection pattern is. A good rule of thumb that many professionals use is one strap for every 4 to 6 linear feet of affected wall. But remember, this is just a guideline, not a hard-and-fast rule for every situation.
For taller walls, you’ll need more straps because they have a greater unsupported span and higher bending forces. If a wall has damage concentrated in a single area, you may need to place the straps closer together in that area and space them out more in other areas. If a wall is deflecting uniformly along its entire length, you’ll need to cover it consistently from one end to the other. The straps should be positioned so that no section is unsupported beyond what the manufacturer recommends as the maximum span.
Do Carbon Fiber Straps Increase My Home’s Value?
While carbon fiber straps don’t directly increase your home’s market value the way a kitchen remodel might, they can protect its value by resolving a serious structural concern. Foundation problems are one of the biggest reasons buyers hesitate or negotiate lower prices.
When professionally installed with documentation and a transferable warranty, carbon fiber repairs demonstrate that the issue has been addressed rather than ignored. Many buyers are far more comfortable purchasing a home with a documented structural repair than one with visible wall cracks and no repair history.
If you’re planning to sell your home, keep all inspection reports, installation paperwork, and warranty documents. These records help reassure buyers that the repair was completed correctly.
Can Carbon Fiber Straps Be Installed on Finished Basement Walls?
Yes—but the finished wall will usually need to be opened first.
Carbon fiber straps must bond directly to the concrete or masonry wall. Drywall, insulation, wood paneling, and other finishes must be removed wherever the straps will be installed.
After the repair has cured and passed inspection, the wall can typically be refinished. Many homeowners choose to leave a small removable access panel so future inspections can easily verify that the wall remains stable.
Will Carbon Fiber Straps Stop Water Leaks?
No.
Carbon fiber straps are structural reinforcement—not waterproofing.
If water is entering through cracks or wall joints, the moisture problem should be addressed separately using solutions such as:
- Exterior grading improvements
- Downspout extensions
- Foundation waterproofing membranes
- Interior drainage systems
- Sump pump installation
Reducing hydrostatic pressure is one of the best ways to prevent additional wall movement and extend the life of any structural repair.
Do Carbon Fiber Straps Require Maintenance?
Very little.
Unlike steel braces or wall anchors, carbon fiber contains no moving parts and won’t rust.
Homeowners should simply inspect the straps once a year and look for:
- New wall cracks
- Separation along the strap edges
- Moisture problems
- Signs of additional wall movement
If anything changes, schedule another structural inspection before the problem becomes more severe.
Are Carbon Fiber Straps Better Than Steel I-Beams?
Neither system is universally better—they solve different structural problems.
Carbon fiber straps work best when:
- Wall movement is relatively minor
- The wall remains structurally sound
- Maximum basement space is desired
- A clean finished appearance is important
Steel I-beams are often recommended when:
- Walls have significant bowing
- Additional structural support is required
- The wall cannot adequately bond to epoxy
- Future wall movement remains a concern
An experienced foundation specialist will determine which solution best matches your wall’s condition.
What Happens If I Wait Too Long?
Foundation damage almost never repairs itself.
Small cracks can gradually become larger, walls can continue bowing inward, and repair options become more expensive as structural damage progresses.
A wall that could have been stabilized with carbon fiber straps today may eventually require wall anchors, helical tiebacks, or complete wall replacement if movement continues unchecked.
Early intervention is almost always the least expensive and least disruptive solution.
Final Thoughts
Carbon fiber foundation straps have become one of the most trusted solutions for stabilizing bowing basement walls because they’re strong, corrosion-resistant, and minimally invasive. When installed correctly on an appropriate wall, they provide permanent structural reinforcement without sacrificing valuable basement space.
However, they’re not the right solution for every foundation problem. The key is understanding why your wall is moving, measuring how much it has moved, and selecting the repair method that addresses both the symptoms and the underlying cause.
If you’ve noticed stair-step cracks, inward bowing, or horizontal wall cracks, don’t wait for the damage to worsen. A professional foundation inspection can determine whether carbon fiber straps are appropriate or whether another repair method will provide better long-term protection for your home.